
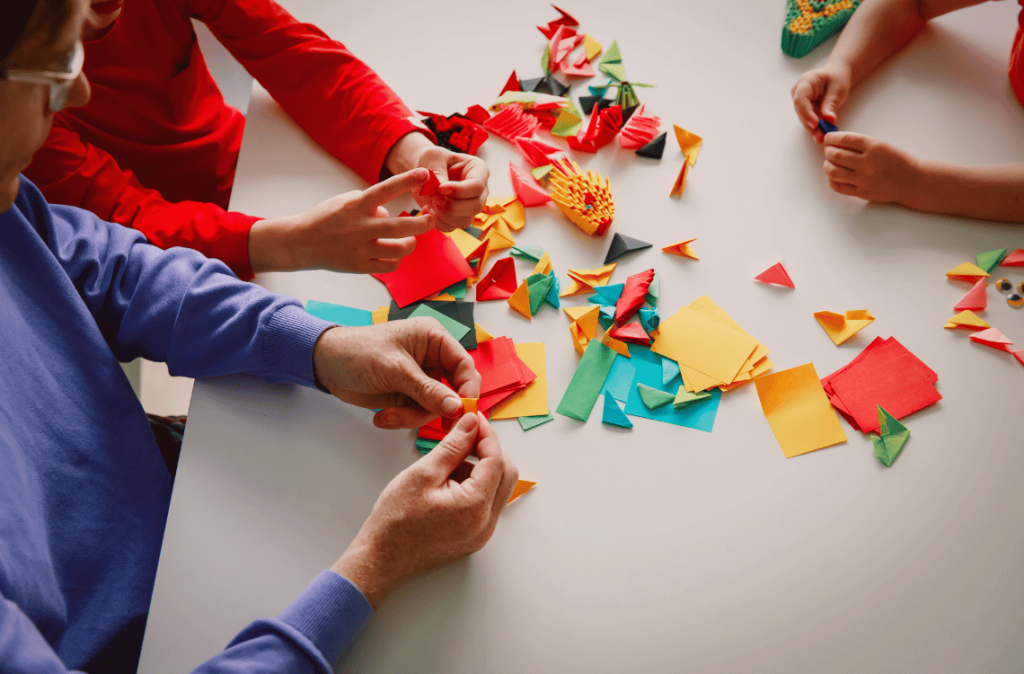
Paper crafts for kids are not only a fun activity but also a tool to foster creativity in kids and help them develop fine motor skills.
Today, we’re going to dive into the world of paper crafts, offering a list of 25 unique and enjoyable craft activities that parents, educators, or caregivers can try out with kids at home or in school.
So, let’s turn that paper into a piece of art!
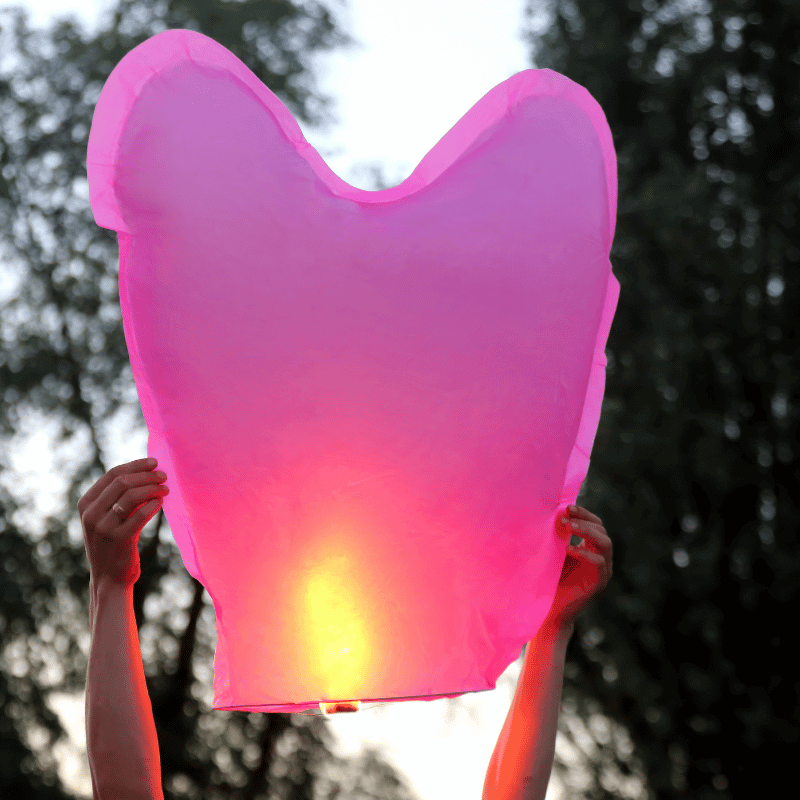
1. Create Heart Paper Lanterns


To create heart paper lanterns, you’ll need some coloured paper, scissors, a ruler, and glue.
Start by folding the paper in half and drawing half a heart shape along the folded edge.
Cut out the heart shape and unfold the paper to reveal a full heart.
Next, cut strips along the edges of the heart, leaving a small border at the top.
Roll the heart into a cylinder and glue the edges together.
Finally, add a battery-operated tea light or LED candle inside the lantern to create a warm and inviting glow.
This activity can help improve fine motor skills and hand-eye coordination and foster creativity and imagination.
2. Name Rainbow Art
Creating name rainbow art is a fun and simple way to help children learn the letters of the alphabet and practice their writing skills.
To get started, have your child write their name in large capital letters on white paper.
Then, provide them with various coloured markers or crayons and encourage them to colour each letter with a different colour, creating a rainbow effect.
This activity can help improve hand-eye coordination, as well as teach children about colours and patterns.
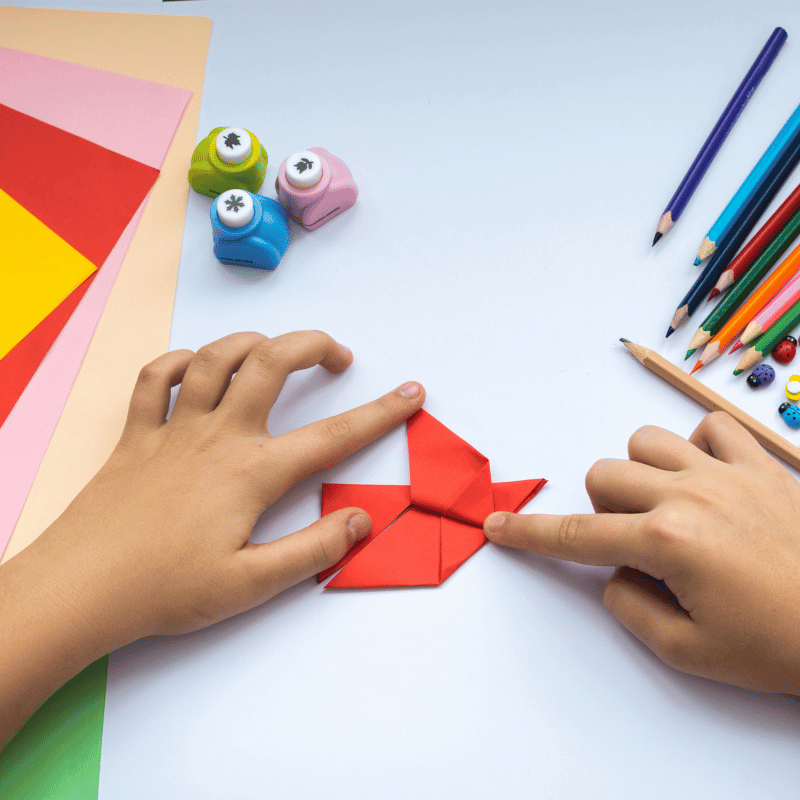
3. Craft Paper Heart Spinners
Making paper heart spinners is a great way to teach children about symmetry and motion.
To create a heart spinner, fold a piece of paper in half and draw half a heart shape along the folded edge.
Cut out the heart shape and unfold the paper to reveal a full heart.
Then, cut a small slit in the centre of the heart and thread a piece of string or yarn through the slit.
Tie a knot at the end of the string to create a loop.
Hold the loop between your thumb and index finger and spin the heart to create a fun and mesmerizing effect.
This activity can help improve fine motor skills and hand-eye coordination, as well as teach children about shapes and patterns.
4. DIY iPhone Speakers
Creating DIY iPhone speakers is a fun and easy way to teach children about acoustics and sound waves.
To make your own iPhone speakers, you’ll need two toilet paper rolls, some tape, and a pair of scissors.
Start by cutting a slit in the bottom of each toilet paper roll, just large enough to fit your iPhone.
Then, tape the two rolls together, side by side, with the slits facing the same direction.
Place your iPhone in the slits and turn up the volume to amplify the sound.
This paper crafts for kids activity can help improve problem-solving skills and encourage creativity, as well as teach children about science and technology.
5. Make Folded Paper Bracelets

Making folded paper bracelets is a simple and fun way to teach children about geometry and patterns.
To create a folded paper bracelet, start by folding a piece of paper in half lengthwise.
Then, fold the paper accordion-style, making sure each fold is the same width.
Once you’ve folded the entire piece of paper, wrap it around your wrist and secure it with a piece of tape or a staple.
This activity can help improve fine motor skills and hand-eye coordination and teach children about shapes and patterns.
6. Craft Folded Paper Ninja Stars
Making folded paper ninja stars is a fun and challenging way to teach children about geometry and spatial reasoning.
In order to create a folded paper ninja star, start by cutting a square piece of paper into a smaller square.
The next step is to fold the paper into a smaller square again and again until you have a small square with multiple layers.
Next, fold the square into a triangle and make several cuts along the edges.
Finally, unfold the paper and carefully fold it into the shape of a ninja star.
This fun papers craft for kids activity can also help improve fine motor skills in kids and hand-eye coordination, as well as teach children about shapes and patterns.
7. Create Paper Mache Pots
Creating paper mache pots is a fun and messy way to teach children about recycling and art.
To make your own paper mache pot, you’ll need a balloon, some newspaper, flour, water, and paint.
Start by blowing up the balloon and tearing the newspaper into small strips.
Then, mix together equal parts flour and water to create a paste.
Dip each strip of newspaper into the paste and apply it to the balloon, overlapping the strips to create a smooth surface.
Once the paper mache is dry, pop the balloon and paint your pot with acrylic paint.
This activity can help improve hand-eye coordination and fine motor skills and teach children about recycling and sustainability.
8. Design Paper Spinners
Creating paper spinners is a fun and easy way to teach children about motion and physics.
You’ll need a piece of paper, a pushpin, and a pencil to make your own paper spinner.
Start by drawing a design on the paper, such as a spiral or a maze.
Then, poke a hole in the centre of the paper with the pushpin.
Hold the paper by the pushpin and use the pencil to spin the paper around, creating a fun and mesmerizing effect.
9. Construct Paper Flextangles
Making paper flextangles is a fun and challenging way to teach children about geometry and patterns.
To create a paper flextangle, you’ll need several paper strips, some tape, and a pair of scissors.
Start by taping the ends of two paper strips together to create a loop. Then, add more paper strips, taping them together to create a longer loop.
Once you have a loop that is several feet long, cut small slits into the paper, spaced about an inch apart.
Finally, fold the paper back and forth, accordion-style, to create a 3D shape.
This paper crafts for kids activity can teach children about shapes and patterns.
10. Craft Origami Paper Claws
Creating origami paper claws is a fun and simple way to teach children about folding and geometry.
To make your own origami paper claws, you’ll need a square piece of paper and a pair of scissors.
Start by folding the paper in half diagonally, then unfold it and fold it in half diagonally the other way.
Next, fold the paper in half horizontally and vertically, creating a plus sign.
Then, fold the corners of the paper into the centre, creating a smaller square.
Finally, cut along the folded edges to create the claws.
11. Express Love with String Art Heart Card
Presently, a heartfelt craft allows kids to engage in the creative process of making thoughtful cards for their loved ones.
Creating a string art heart card is a fun and unique way to express love and creativity.
To make your own string art heart card, you’ll need a piece of cardstock, a pencil, a needle, and some embroidery floss.
Start by drawing a heart shape on the cardstock with the pencil. Then, poke holes along the outline of the heart with the needle.
Next, thread the embroidery floss through the needle and tie a knot at the end.
Begin stitching along the outline of the heart, creating a zigzag pattern.
Once you’ve stitched all the way around the heart, tie off the floss and trim the excess.
12. Craft Paper Origami Heart & Bookmark
Creating a paper origami heart and bookmark is a fun and simple way to teach children about folding and geometry.
To make your own paper origami heart and bookmark, you’ll need a square piece of paper and a pair of scissors.
Start by folding the paper in half diagonally, then unfold it and fold it in half diagonally the other way.
Next, fold the paper in half horizontally and vertically, creating a plus sign.
Then, fold the corners of the paper into the centre, creating a smaller square.
Finally, fold the top layer of the paper in half towards you and unfold it.
Fold the top corners in towards the centre and then fold the bottom edge up to create a heart shape.
Cut a slit in the bottom of the heart to create a bookmark.
This paper crafts for kids activity can help improve fine motor skills and hand-eye coordination.
13. Make Colorful Paper Pinwheels
Creating colourful paper pinwheels is a fun and easy way to teach children about symmetry and motion.
You’ll need a square piece of paper, a pushpin, and a pencil to make your own paper pinwheels.
Start by folding the paper in half diagonally, then unfold it and fold it in half diagonally the other way.
Next, fold the paper in half horizontally and vertically, creating a plus sign.
Then, fold the corners of the paper into the centre, creating a smaller square.
Finally, poke a hole in the centre of the square with the pushpin and attach the pinwheel to a pencil.
This fun and exciting activity can help improve fine motor skills and hand-eye coordination, as well as teach children about patterns.
14. Craft Fairy Paper Quilling
Creating fairy paper quilling is a fun and intricate way to teach children about art and design.
To make your own fairy paper quilling, you’ll need some quilling paper, a tool, and some glue.
Start by rolling the quilling paper into tight coils with the quilling tool.
Then, use the glue to attach the coils together, creating a fairy shape.
Once you’ve created the basic shape, add more coils and details to create the wings, dress, and hair.
15. Make Mini Origami Photo Album

Meanwhile, a keepsake activity like mini origami photo albums combines craft with memory preservation for those precious moments.
Creating a mini origami photo album is a fun and simple way to teach children about folding and organization.
To make your own mini origami photo album, you’ll need several square pieces of paper and some glue.
Start by folding the paper in half diagonally, then unfold it and fold it in half diagonally the other way.
Next, fold the paper in half horizontally and vertically, creating a plus sign.
Then, fold the corners of the paper into the centre, creating a smaller square.
Finally, fold the top layer of the paper in half towards you and unfold it.
Fold the top corners in towards the centre and then fold the bottom edge up to create a pocket.
Glue the pockets together to create a mini photo album.
16. Recycle Magazine Art
Creating magazine art is a fun and eco-friendly way to teach children about recycling and creativity.
To make your own magazine art, you’ll need some old magazines, scissors, and glue.
Start by cutting out interesting shapes and patterns from the magazines.
Then, arrange the shapes and patterns on a piece of paper or cardboard to create a collage.
Once you’re happy with the design, glue the pieces in place.
This paper crafts for kids activity teaches children about recycling and sustainability.
17. Create Easy Paper Beads
Creating easy paper beads is a fun and simple way to teach children about geometry and patterns.
To make your own easy paper beads, you’ll need some coloured paper, scissors, and glue.
Start by cutting the paper into thin strips. Then, roll the strips of paper into tight coils, adding a drop of glue to hold them in place.
Once the glue is dry, you can string the beads together to create a necklace or bracelet.
18. Chain Hearts Together
Next, creating a chain of hearts is a fun and simple way to teach children about patterns and symmetry.
To make your own chain of hearts, you’ll need some coloured paper, scissors, and a stapler.
Start by cutting out several heart shapes from the paper. Then, staple the hearts together, linking them in a chain.
This activity teaches children about patterns and symmetry.
19. Make Easy Harry Potter Bookmarks
Are any Harry Potter fans here? You are going to love this one!
Creating easy Harry Potter bookmarks is a fun and simple way to teach children about literature and creativity.
To make your own easy Harry Potter bookmarks, you’ll need some coloured paper, scissors, and a marker.
Start by cutting out a strip of paper that is about 2 inches wide and 6 inches long.
Then, draw a lightning bolt or the Hogwarts crest on the paper with the marker.
Finally, punch a hole in the top of the bookmark and add a ribbon or string to attach it to your book.
This activity teaches kids about literature and creativity.
20. Craft Stick and Tissue Paper Lantern
To create a beautiful and colorful craft stick and tissue paper lantern, you’ll need some jumbo craft sticks, tissue paper in various colors, scissors, glue, and a battery-operated tea light.
Start by arranging the craft sticks in a square or rectangular shape, depending on the size of the lantern you want to create.
Then, cut or tear the tissue paper into small squares or rectangles.
Next, apply a thin layer of glue to the top of one craft stick, then place a piece of tissue paper on top of the glue.
Repeat this process until the top of the craft stick is covered with tissue paper.
Do the same for the remaining craft sticks, overlapping the tissue paper slightly so no gaps are visible.
Once all the craft sticks are covered with tissue paper, allow the glue to dry completely.
Finally, place a battery-operated tea light inside the lantern and turn it on.
The light will shine through the tissue paper, creating a warm and inviting glow.
This paper crafts for kids activity can help improve fine motor skills and hand-eye coordination and teach children about colour mixing and creativity.
21. Craft Snowflakes With Their Names
Creating snowflakes with their names is a fun and personalized way to teach children about symmetry and creativity.
You’ll need some white paper, scissors, and a pencil to make your own snowflakes with their names.
Start by writing the child’s name in the centre of the paper.
Then, fold the paper in half and then in half again, creating a small triangle. Cut out small shapes and patterns along the edges of the triangle, being careful not to cut all the way through the paper.
Once you’ve cut out several shapes and patterns, unfold the paper to reveal a unique snowflake with the child’s name in the centre.
This activity can help improve fine motor skills and hand-eye coordination for the children
22. Craft Pop-Up Minecraft Cards
Calling all Minecraft fans.
Creating pop-up Minecraft cards is a fun and engaging way to teach children about art and design.
You’ll need some cardstock, scissors, and a ruler to make your own pop-up Minecraft cards.
Start by cutting out a square piece of cardstock and folding it in half to create a card.
Then, cut out several Minecraft shapes and patterns, such as a creeper or a block of diamond. Next, use a ruler to measure and mark where you want the shapes to pop up on the card.
Finally, use scissors to carefully cut along the marked lines, being careful not to cut all the way through the paper.
Once you’ve cut out the shapes, fold them along the creases and glue them to the inside of the card.
This activity teaches children about art and design.
23. Craft a Neverending Emoji Card
Creating a neverending emoji card is a fun and playful way to teach children about communication and creativity.
To make your own neverending emoji card, you’ll need some paper, scissors, and a marker.
Start by drawing several emoji faces on the paper, such as a happy face, a sad face, and a surprised face.
Then, cut out the emoji faces and arrange them in a circle, overlapping them slightly.
Finally, attach the emoji faces with a brad or a paper fastener, creating a neverending loop.
This activity teaches children about communication and creativity.
24. Create a Paper Cube Cactus Craft
reating a paper cube cactus craft is a fun and unique way to teach children about geometry and design.
To make your own paper cube cactus craft, you’ll need some green paper, scissors, and glue.
Start by cutting out several square pieces of paper. Then, fold the squares in half diagonally and then in half diagonally again, creating a smaller square.
Next, fold the smaller square in half horizontally and vertically, creating a plus sign.
Lastly, fold the corners of the square into the centre, creating a 3D cube.
Glue several cubes together to create a cactus shape.
This activity is a great source of geometry and design learning for the children.
25. Fold an Origami Starship Enterprise

Lastly, boldly go where no paper craft has gone before, by replicating the iconic Star Trek ship with an origami Starship Enterprise project for little sci-fi fans.
Folding an origami Starship Enterprise is a fun and challenging way to teach children about geometry and spatial reasoning.
To make your own origami Starship Enterprise, you’ll need a square piece of paper and a pair of scissors.
Start by folding the paper in half diagonally, then unfold it and fold it in half diagonally the other way.
Next, fold the paper in half horizontally and vertically, creating a plus sign.
Then, fold the corners of the paper into the centre, creating a smaller square.
Finally, follow the instructions for folding the Starship Enterprise, which can be found online.
This activity teaches children about geometry and spatial reasoning.
Summary: Choosing Fun Paper Crafts for Kids
By incorporating these 25 paper crafts for kids, you not only provide enjoyable activities, but you also stimulate young minds, encourage creativity, and expand a child’s interest while adding a personal touch to their learning process.
These craft activities are an amazing way to keep them entertained and creatively stimulated.
Each craft uses simple materials, usually available at home, making crafting an accessible activity for all.
Encourage creativity in a child’s routine, as it has always proved beneficial, and paper craft activities are a hands-on, inexpensive, easy way to achieve that.
Remember, the goal of paper crafts for kids is not to push kids to be perfect in these activities but to provide a platform where they can explore, be creative, and have fun. So, let’s get crafting!